

Controllers have develop into an important a part of video video games whether or not you play video games on a console or PC. That stated, as producers proceed packing increasingly tech into their controllers, they’re additionally getting harder to disassemble, not to mention restore.
On an Xbox Sequence X|S controller, additional vibration motors, extra sensors, and added circuitry are just some issues it’s important to take care of when taking aside a controller for upkeep now. They make issues more durable, certain, however it’s not inconceivable to take it aside.
Why Ought to You Take Aside Your Xbox Sequence X|S Controller?
Relying on how usually you play video games, your Xbox Sequence X|S controller will get a good bit of motion. Not solely can frequent use result in points like stick drift, however common upkeep now and again will not harm.
For many issues, you’ll have to a minimum of take aside the exterior shell of your Xbox controller. Easy duties like repairing or changing a button or set off, checking battery connections, and even cleansing any accrued grime across the controls would require primary disassembly.
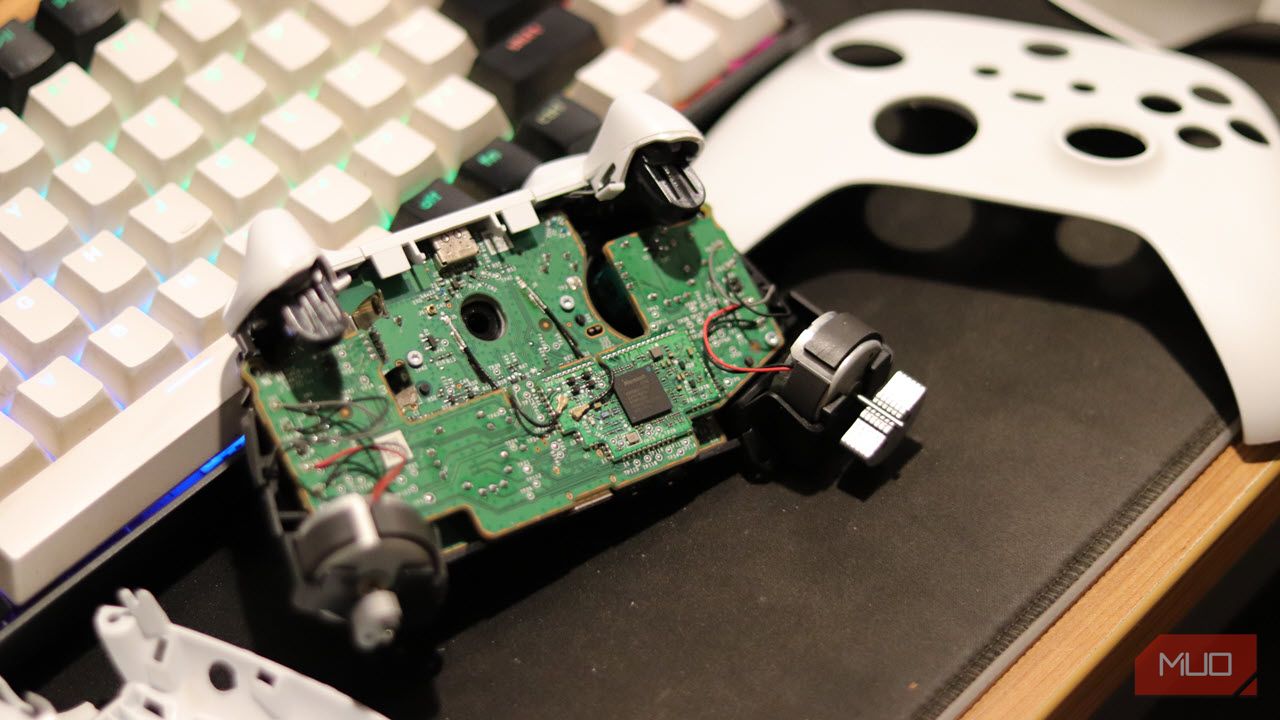
Should you’re finishing up a fancy restore like changing your thumbsticks, you will must go even additional and take the daughterboard out as properly, as Xbox controllers are inclined to have two separate PCBs inside. Even fixing your Xbox controller’s drifting points would possibly require an in-depth teardown.
What Gear Do You Want?
We have already coated tips on how to take aside your Xbox One controller, and whereas the method is essentially related, Xbox Sequence X|S controllers include extra circuitry such because the set off vibration motors which require additional steps. Moreover, Xbox Sequence X|S controllers include Torx Safety screws as a substitute of standard Torx screws, so you will want the corresponding bits as properly.
General, this is every little thing you want:
Torx Safety screwdriver (with T6, T8, and T9 bits) Flathead screwdriver A plastic prying instrument or spudger (a thick guitar choose would work too) A pair of tweezers
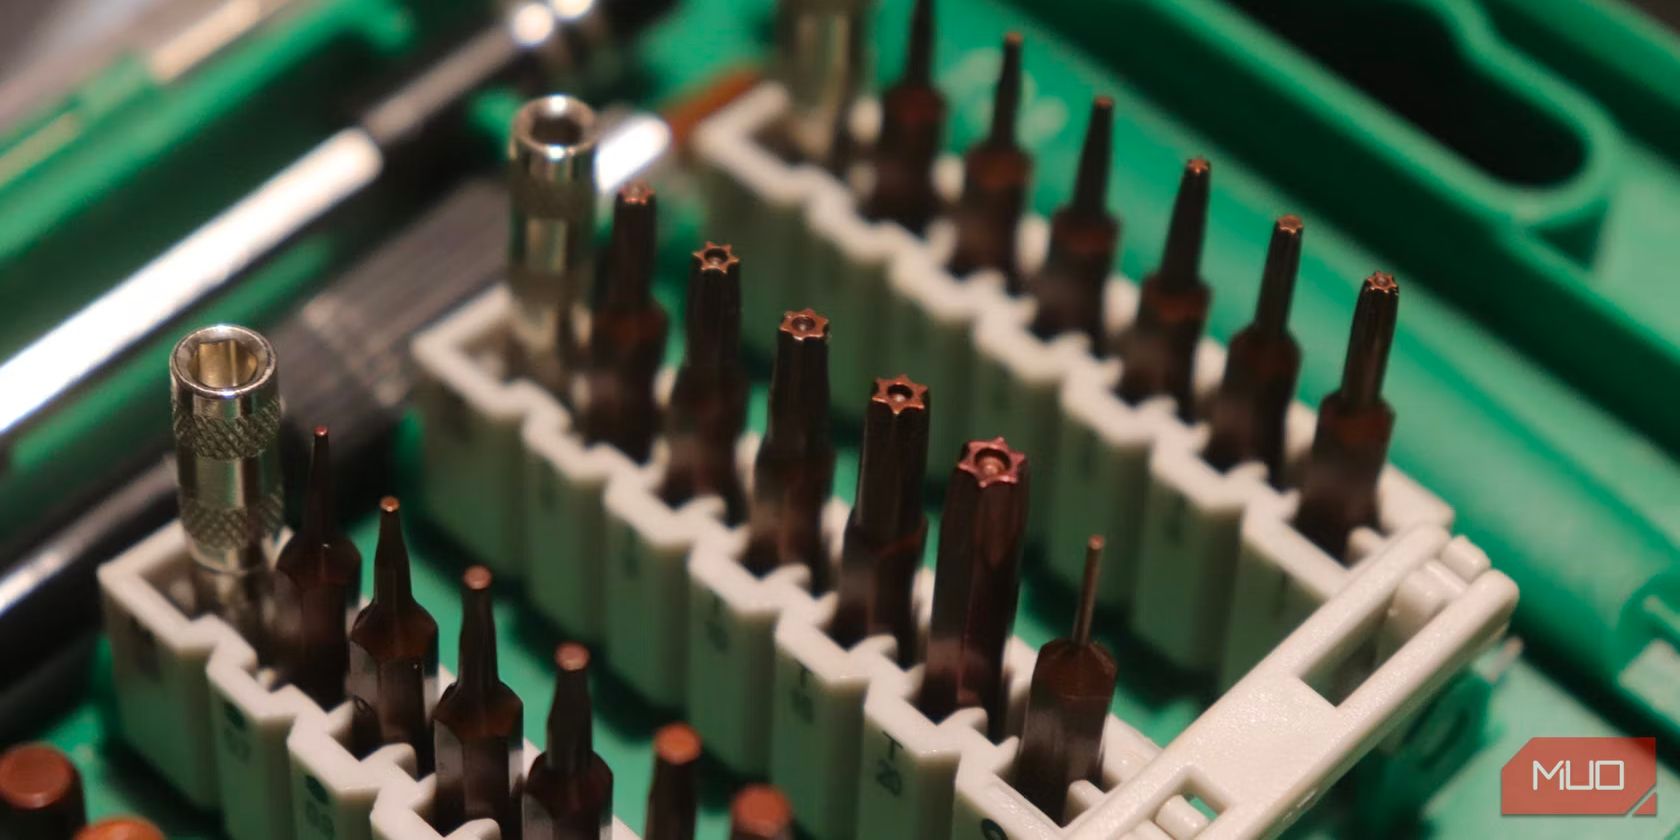
In case you do not have the instruments required, you possibly can spend money on any of the various toolkits out there on Amazon for round $10.
Tips on how to Take Your Xbox Sequence X|S Controller Aside
Now that you’ve got every little thing you want readily available, disassembling an Xbox Sequence X|S controller is definitely not that tough. Simply observe these steps.
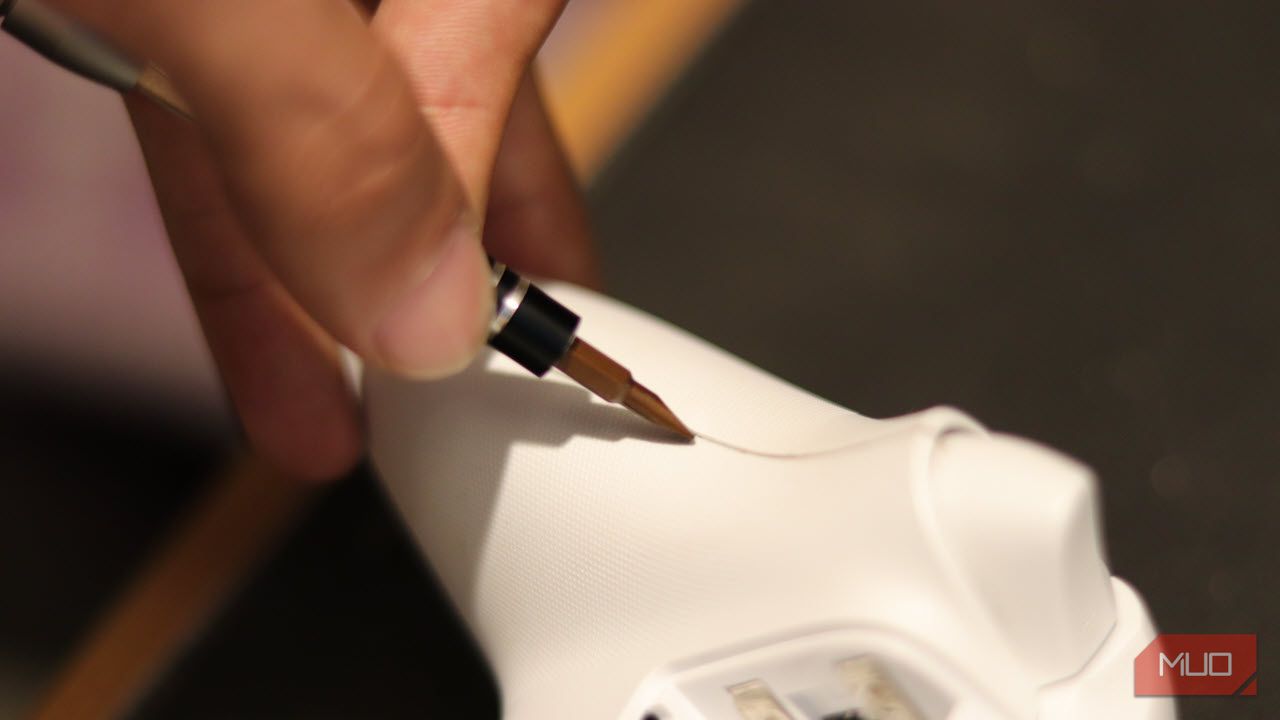
Take away the door to the battery compartment and take out the batteries. You will additionally must take away the sticker contained in the battery compartment because it hides a screw beneath. You may both warmth it up with a hair dryer or simply punch by way of along with your screwdriver. Utilizing the plastic prying instrument or spudger, take away the plastic panels from the controller’s handles the place your palms sit. This may be tough, so be affected person and mild as you wiggle the prying instrument underneath the sting to unclip the panels.
As soon as the panels are off, you will must take away the 5 Torx Safety screws—two on every deal with, one underneath the sticker within the battery compartment. The back and front panels ought to merely come off now. At this level, you will have entry to the thumbsticks, D-pad, triggers, and the face buttons.
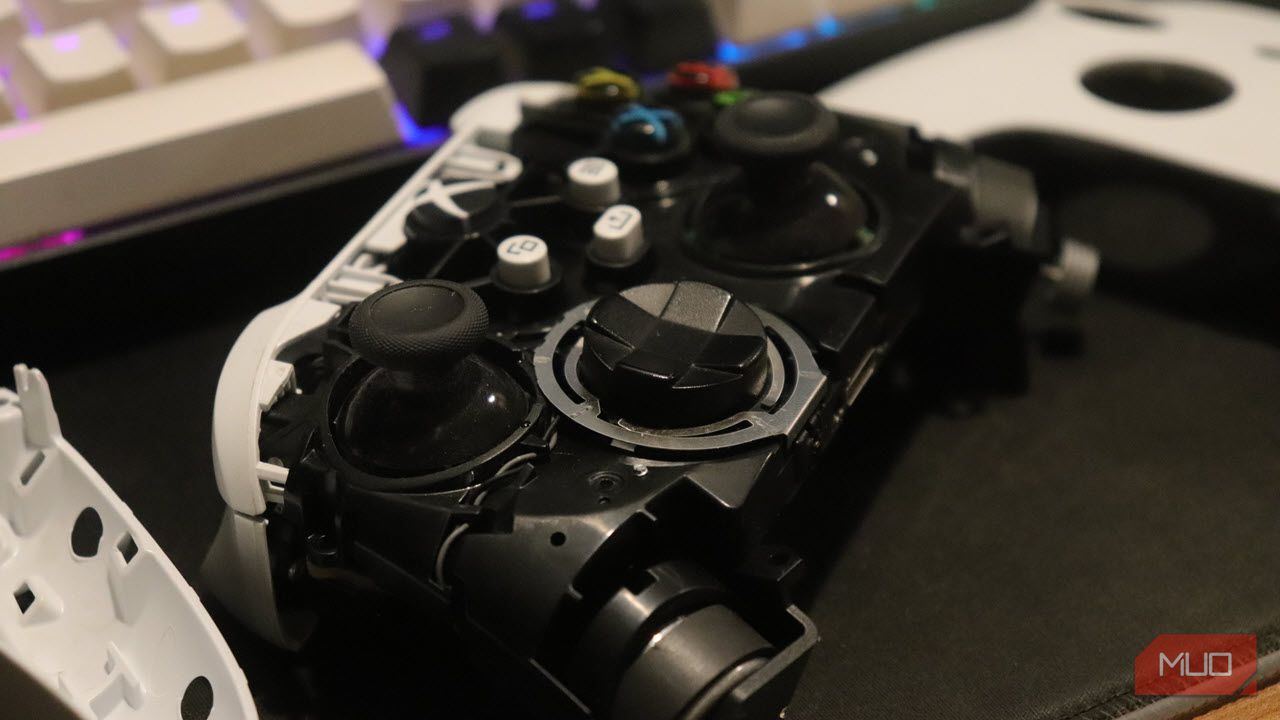
Flip the controller over and use the prying instrument to unclip the plastic tab defending the USB-C port. Take away the tabs holding down the shoulder buttons from the left and proper. This may be difficult, so watch out to not break the tabs. As soon as the tabs are open, take off the plastic cowl.
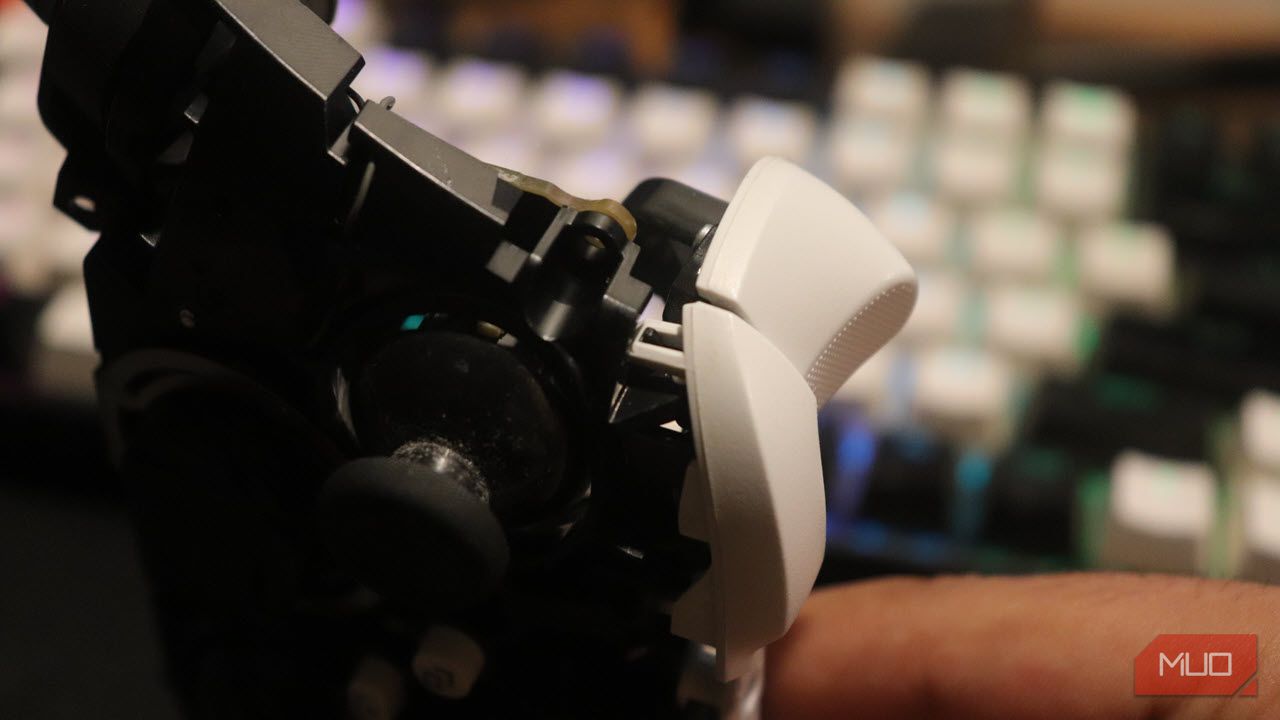
Use a T6 bit to unscrew the set off vibration motors. The set off ought to routinely come free at this level.
Should you’re seeking to exchange or restore the triggers, you will must be cautious of the set off vibration motors as properly. They’re soldered onto the mainboard with fairly skinny wires that’ll snap off if you happen to put an excessive amount of stress on them. Moreover, the principle vibration motors are wired by way of the face buttons on the appropriate and the left stick on the left, so watch out to not snap them off or bend them an excessive amount of.
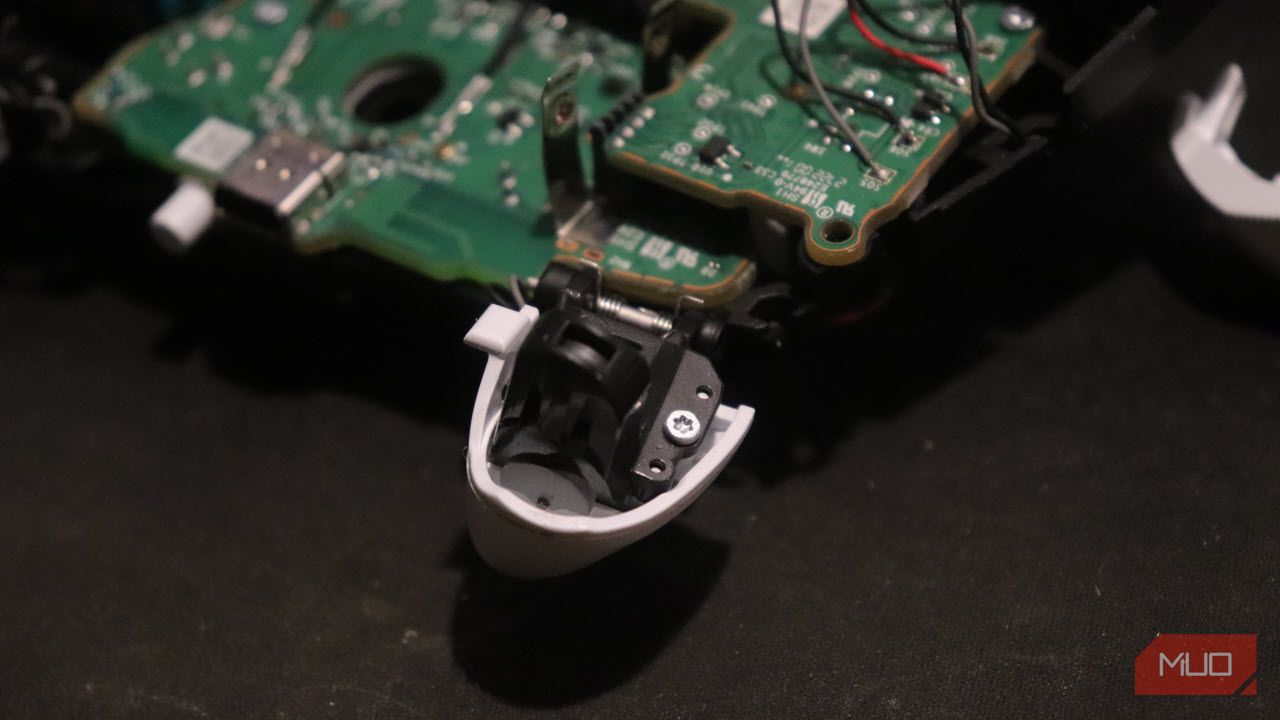
In case you are seeking to tear down your controller even additional, you will must take away the 2 wires for the built-in wi-fi receiver from the daughterboard earlier than eradicating the screws that maintain it in place. Do remember the fact that going additional would require some extra electronics know-how, so do not proceed until you recognize what you are doing.
What Can You Do After Taking Aside Your Xbox Sequence X|S Controller?
As talked about above, when you’re executed with the disassembly, you possibly can perform nearly any upkeep or restore work in your controller, together with however not restricted to:
Cleansing your controller from the within Fixing stick drift Swap out your vibration motors, though this might require some delicate soldering (as would changing absolutely anything else), so warning is suggested Changing the thumbsticks (requires soldering)
You may as well customise your Xbox Sequence X|S controller to your coronary heart’s content material. For the reason that face buttons will come off as soon as you have eliminated the motherboard, you possibly can swap them out for a distinct colour or fashion.
The Xbox button’s colour can be modified by placing a skinny movie of coloured plastic underneath the button when placing the controller again once more. For the reason that entrance and the again panels are off now, spray-painting them to a distinct colour can be not a nasty thought. Do be mindful although that in case your controller is another colour besides white, the top outcome might not be precisely what you anticipated. Nonetheless, as soon as all of the items are out, the sky is the restrict.
Xbox Controllers Would possibly Be Laborious to Disassemble, however Not Unimaginable
With the appropriate instruments, taking aside your Xbox Sequence X|S controller is barely a matter of some minutes. As soon as it’s disassembled, you possibly can perform basic upkeep, repairs, exchange components, and even customise your controller the way in which you need.
General, with a couple of instruments and a little bit little bit of time, it can save you your self some cash and stop your controller from ending up within the trash by repairing or customizing it to breathe new life into the peripheral.

")


/cdn.vox-cdn.com/uploads/chorus_asset/file/25693470/ecobee_x_Yale_x_August___1.jpg "Now you can unlock your door from Ecobee’s app")


")
")


